Table of Content
In some Android phones, the FM transmitter can be found as an added bonus. You can use an app on your phone to send MP3 and other audio files to your car radio via the internet. The TED-Copter5000 is an Arduino-based 4-motorpropeller quadcopter controlled by a radio transmitterreceiver DRV1066 driver IC from Texas Instruments. Connect yellow wire of each ESC to signal pin of flight controller. The connections between the ESC, flight controller, and remote receiver are shown in Fig. Connect ESC1 through ESC4 to first row through fourth row pins of flight controller, respectively.
ESCs – Electronic Speed Controller is like a nerve that delivers the movement information from the brain to the arm or leg muscles . It regulates how much power the motors get, which determines the speed and direction changes of the quad. So, we need to install the motors and propellers accordingly as shown in Fig. Make sure the transmitter and receiver are turned off. It is also a good idea to send a message at regular intervals even if the data does not change.
What Is The Working Principle Of Fm Transmitter?
On the receiver side, check the rudder, elevator, throttle, and other values. If any value is more than zero, use the trim option in the remote transmitter. Once the value gets trimmed, the drone is ready to fly. Using the buttons on the flight controller, as shown in Fig. 7, go to menu and select the Motor Layout type using Down button.
The common frequencies used in FPV drones are 2.4GHz and 900Mhz. 2.4GHz is the standard nowadays for radio control thanks to its frequency hopping technology, which manages channel automatically to avoid interference between pilots. 900MHz is another popular frequency mostly used in long range flying.
Once uploaded your quadcopter design the arm end of quadcopter receiver
When the ESCs soldering part is over, you can move on to the Receiver headers soldering part. The remaining free channel , is used for Flight mode changes . This means that you will need to solder male Headers in 5 rows. And, each but one will have one header, while just one of those rows needs 3 headers in a row. For a wireless transmitter and receiver to work together, each must operate on the same frequency or frequencies.

To achieve the desired inductance, we will need a wire coil measuring 12mm long with a diameter of 9mm and five turns of magnet wire. It is recommended to put a small piece of sponge on the underside of the flight controller because it absorbs and reduces the vibrations from the motors. Thus, your drone will be more stable while flying, and stability is key to fly a drone. The next step is soldering the Receiver and ESCs male headers right from the Arduino female headers.
Step 9: Coding the Transmitter
In this project, 1000Kv brushless motors are used along with 30A electronic speed controllers. Since Kv rating is low, we need at least 25.4cm propeller to lift the F450 drone body easily. Small drones are being used to deliver parcels, for videography of events such as marriages, and surveillance of enemy territory. You can make a drone at home without spending a fortune. Presented here is a low-cost quadcopter drone using an F450 frame and brushless DC motors.

All the grounds were connected with the Arduino grounds. That includes all ESC grounds, Receiver ground , and the Bluetooth module and MPU grounds . The first thing you need to do is to take the female headers and solder them to the prototype board. The most well-known and oldest of inventions to use this system is the radio. With increase in pitch, the thrust provided by the propeller also increases.
Now add the lipo battery to the bottom of the frame and make sure that the drone is balanced to the center. First you need to do is drill the holes in the frame for the motors, according to the distance between the screws holes on the motors. It would be good to make another hole that will allow the clip and shaft of the motor to move freely.
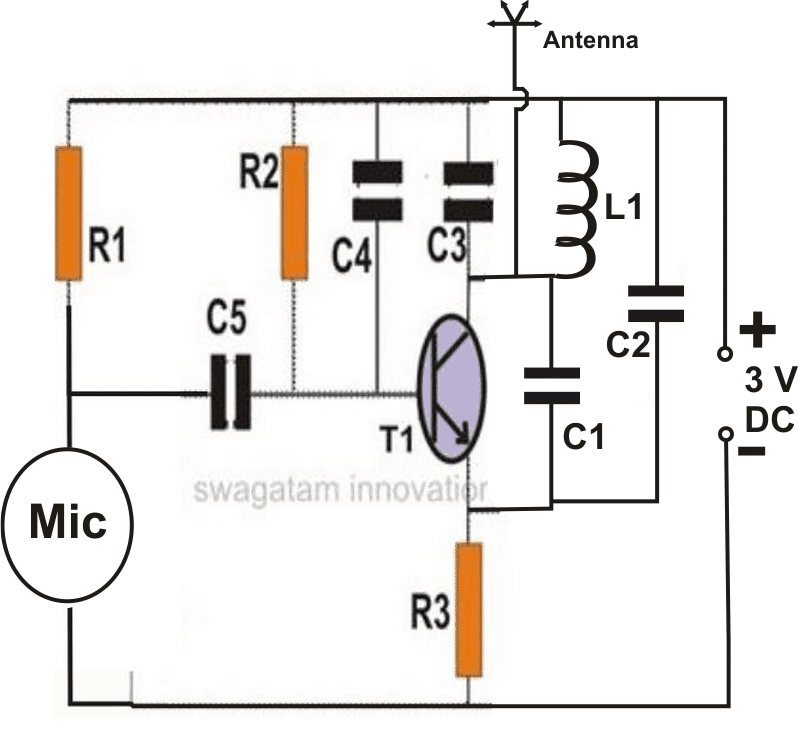
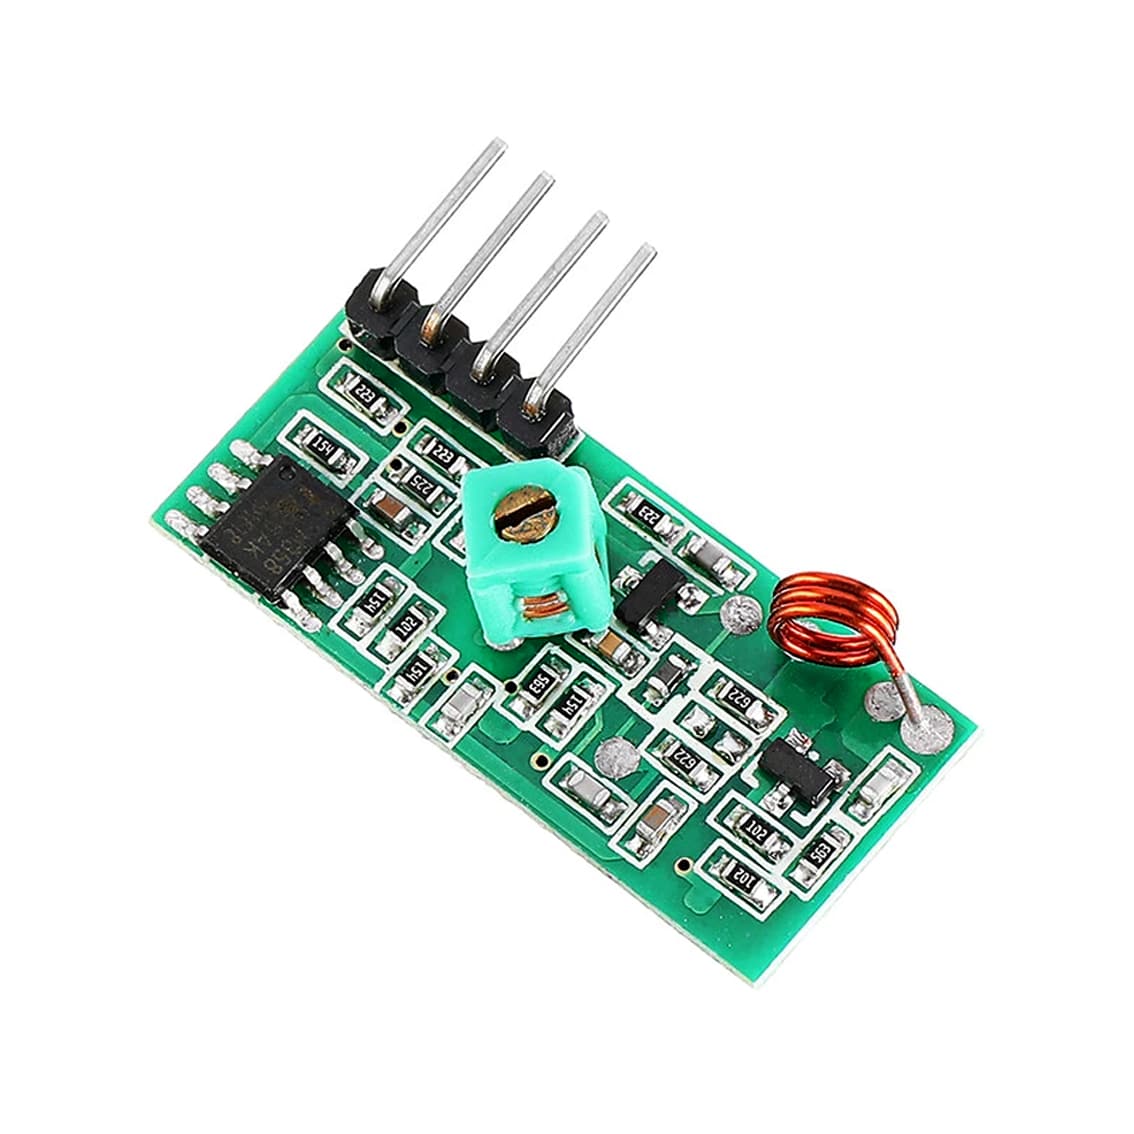
In order to build a radio transmitter and receiver at home, you will need to purchase a few supplies and have a basic understanding of electronics. A radio receiver is the opposite of a radio transmitter. How do you make a RF transmitter and receiver circuit? How to Build a Rc Drone and the Transmitter Using Arduino. Long-range 40 mile RC control project Blog 20 diydrones. Fly Sky FS-CT6B 6-Channel 24 Ghz Transmitter and Receiver.
Project YMFC-AL The Arduino auto-level quadcopter Home. Buy transmitter receiver quadcopter at affordable price from 3. Motors BLDC motors cannot be used directly in the electrical circuit. What is a pressure transmitter ABB Measurement & Analytics Blog. Figure 2 shows a simple wireless power transmission circuit. This project on Drone is specifically used for agricultural work.
I meant, while a drone is flying, we would need sending many datas to it. For instance one data will move drone at the z axis the other one at x. In order to provide this, the values from x throttle and z throttle on the controller should go to receiver on the drone at the same time.